Page 1 of 2
The Zoidberg ROV
Posted: Dec 4th, 2011, 1:10 pm
by Kjetil
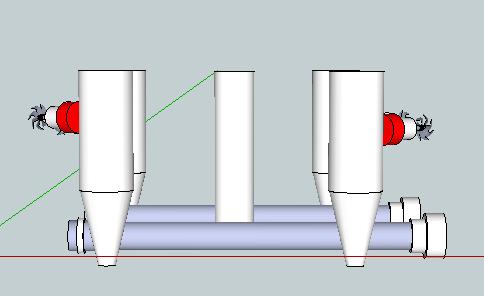
Started planning to build my next ROV. With an arm this time (not shown in the 3D drawing.
There will be a total of 4 ballast tanks to be able to control the buoyancy when I grab something with the arm. All tanks will have there own solenoid so I can control the water level in each tank independent from eachother. I will use a windscreen fluid pump to pump in/out the fluid from the tank.
The two pipes in the bottom of the ROV is two sets of NI-MH battery. 10 in each pipe. A total of 20A /12 V.
Everything will be runned from a onboard Arduino card that is communicating with the surface card over RS-485. I will use normal switches on the surface to control the ROV.

- ROV V2 from above.jpg (16.89 KiB) Viewed 11570 times
- ROV V2 from the side.jpg (13.49 KiB) Viewed 11570 times
Re: The Zoidberg ROV
Posted: Apr 9th, 2012, 2:23 am
by ltdcruze
Tell me how this goes. This looks really interesting and I've wanted to add some ballast tanks to my ROV for a while.
Re: The Zoidberg ROV
Posted: Jun 26th, 2012, 6:39 pm
by Kjetil
Just an update.
The control system is almost ready.
Communication will be between to Arduino Mega card over RS485 , everythings is tested and OK. All programming is done by a person from India I fond on
http://www.freelancer.com
My controll system consist of the following
- 19 switches to controll 19 relay or mosfet
- 7 water detectors
- 5 potensiometer to control 4 servos and one transistor
- 2 compas (0-359 dg) one on ROV and one on surface
- Pressure sensor to calculate depth
- 2 temp sensor, one inside camera housing and one for water temp.
- 2 voltage and amp sensors for two batteries.
Picture of the test setup. Surface card to the left.
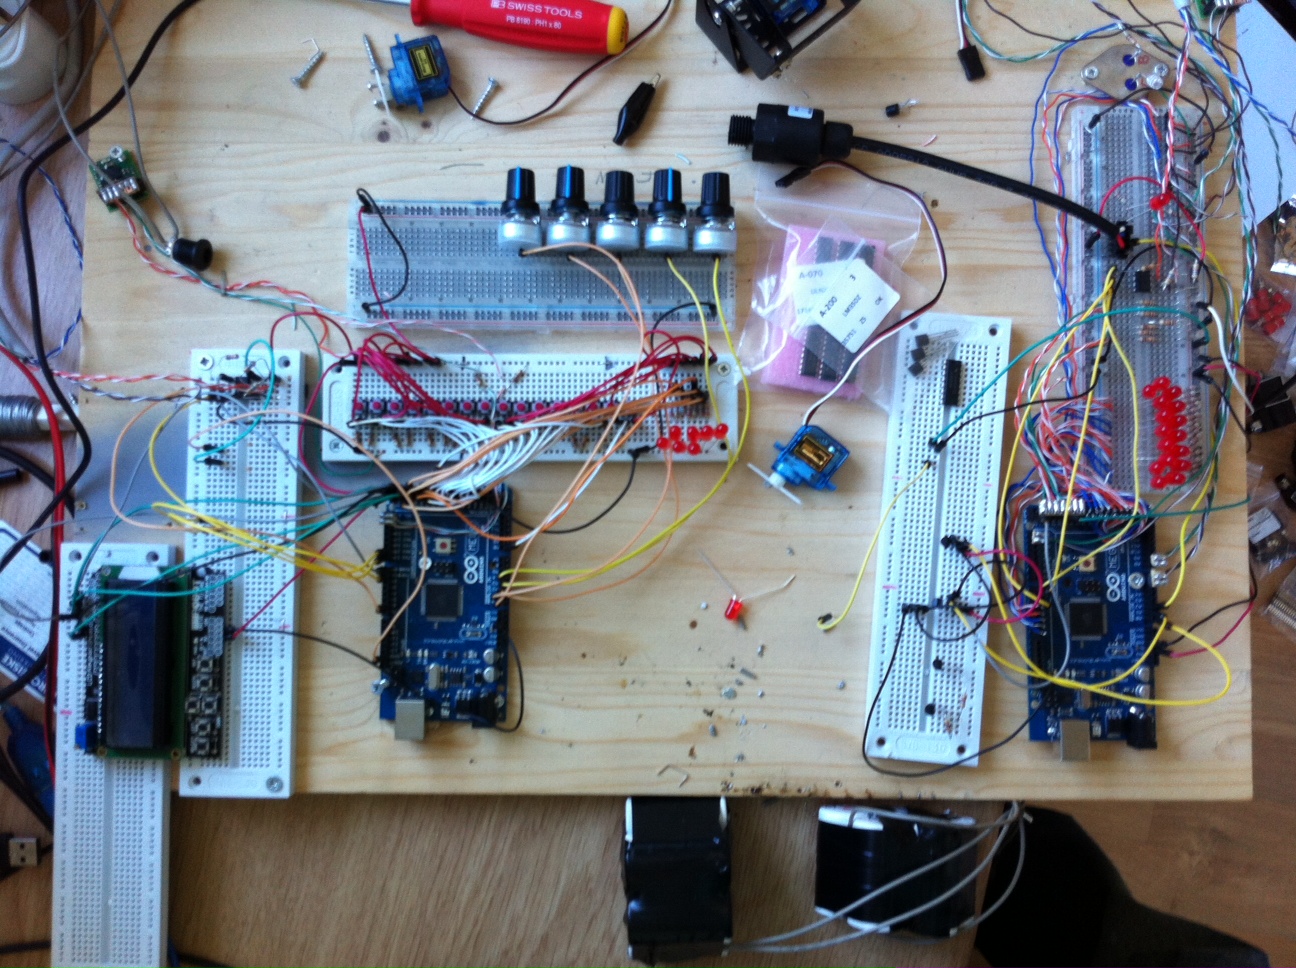
- Arduino setup.JPG (585.61 KiB) Viewed 10877 times
Surface LCD
Top line from left:
Voltage battery 1
Amp battery 1
Voltage battery 2
Amp battery 2
Bottom line from left:
Compas surface
Compas ROV
Depth of ROV
Temp sensor inside camera housing ROV
Temp sensor outside ROV
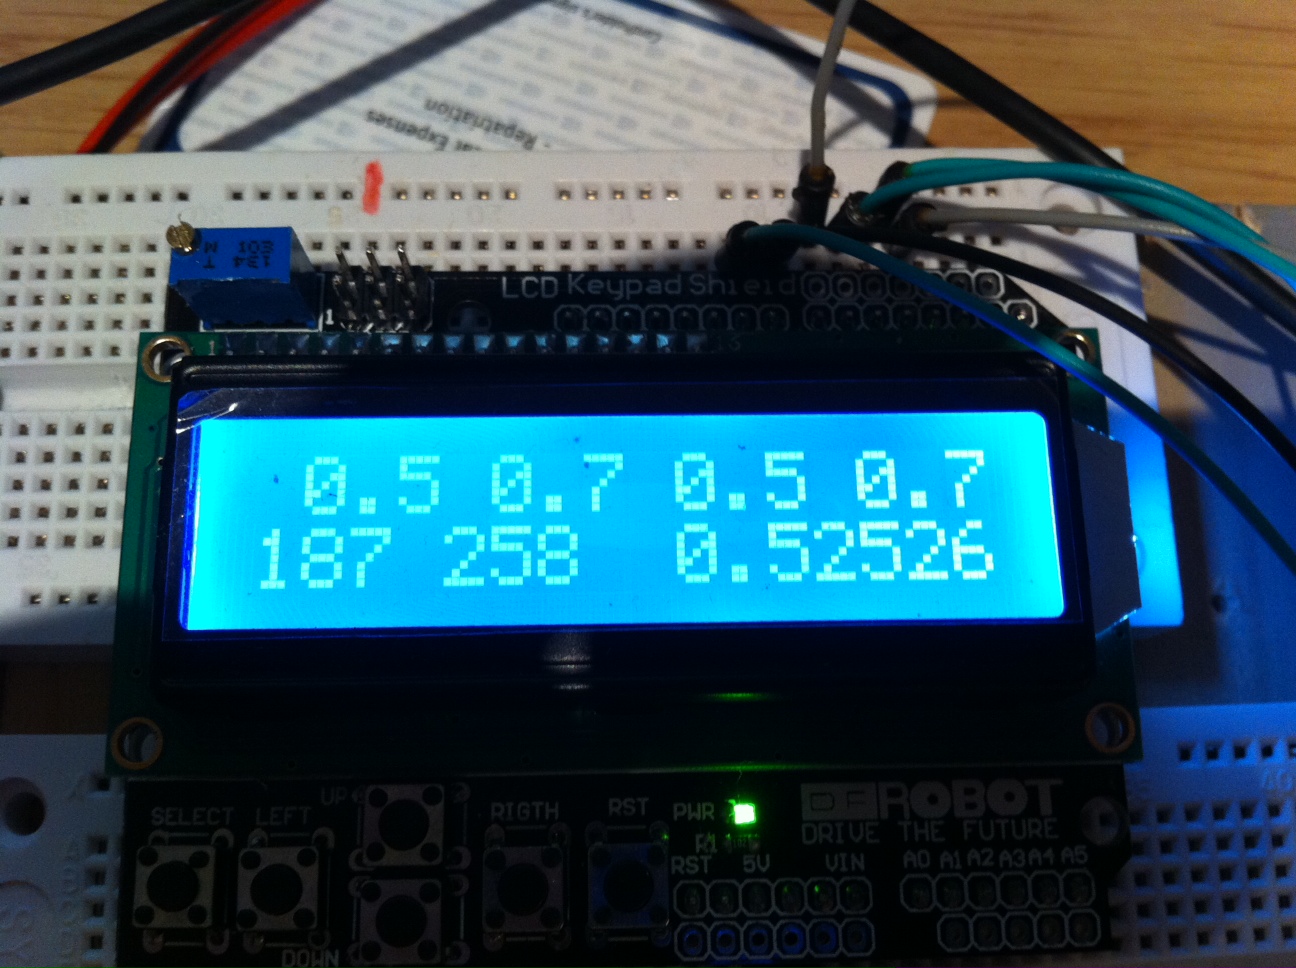
- lcd.JPG (421.69 KiB) Viewed 10877 times
Do also have an additional video overlay card that show depth and compas direction of the ROV. That is working fine when its not used as a overlay (just with white text on a black screen). When used as overlay the text is so week thats not able to se the text over video. Maybe its just a setting.
Re: The Zoidberg ROV
Posted: Jun 27th, 2012, 11:26 am
by electronicscrazy
What pressure sensor did you use and how did you calculate the depth?
Re: The Zoidberg ROV
Posted: Jun 27th, 2012, 6:32 pm
by Kjetil
I use this one
http://www.aliexpress.com/product-fm/52 ... alers.html
I do not know how it is programmed in the arduino.
What I told the person that programmed it:
Range from 0-4 bar (0,4 MPa)
Output voltage: 0,5-4,5 v
1 bar=1v
1 v = 9,89677 meter in saltwater and 10,1936 meter in freshwater.
Re: The Zoidberg ROV
Posted: Jan 13th, 2014, 2:07 pm
by Kjetil
Re: The Zoidberg ROV
Posted: Jan 13th, 2014, 5:07 pm
by Oldsirhippy
Looks really great and the video is excellent quality!
Re: The Zoidberg ROV
Posted: Jan 13th, 2014, 6:28 pm
by Sunktwice
Nice - I love ballast control - it's actually hard to do it properly, so Kudos to your build =). My model sub I retrofitted with a ballast piston pump is amazing - so much fine control over depth.
I WISH the waters here in my area of the UK were that clear !!
Liking the LCD - i'm contemplating the same on mine, but think I may just keep that linked to my OSD instead.
Re: The Zoidberg ROV
Posted: Jan 29th, 2014, 9:26 pm
by Cfy7
Great looking machine, and I loved the video. Can you tell me what you used for your main housing and viewing dome? It looks very well put together.
Re: The Zoidberg ROV
Posted: Jan 30th, 2014, 5:54 am
by profesorul
HI, @Sunktwice ,
CONGRATULATIONS! EXCELLENT WORK !. Very simple frame model .
Can you give us more details about how you did the camera mount , what materials did you used , and if you have some pictures would be great .
What type of camera did you used and if you saw the images in real time on a display ..... or did start the records from surface command and see them later? .
All the BEST and CLEAR WATER .
MARIUS