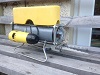
I recently retrofitted an off the shelf video overlay system (HUD) and digital compass into a VideoRay Scout. The first test of the system can be seen here: http://www.youtube.com/watch?v=cmp8o6xb98w
My apologies for the boring video, visibility was around 6 inches (3 cm) that day.
I just got an updated overlay board that includes more display options that I hope to install later this winter. When I do, I'll take photos and post info so anyone else who wants to do this will be able to. Total out of pocket cost was under $400 and took an afternoon to build.
I have some other projects I will be building into the Scout (sonar, gabber/manipulator, etc.) that I will be posting as they are completed.
DIY compass and HUD
Re: DIY compass and HUD
I'm working on a compass osd which should cost me no more than £30.
Using a gy-26 compass module passing it's data to an arduino nano microcontroller and then to a max7456 osd chip.
This will also take leak a detect input to display "LEAK!" on screen.
Hopfully i can make it small enough to fit in my crowded hull.
I'll make the progam code available once i've tested it. waiting on parts from china at the moment.
Re: DIY compass and HUD
No doubt DIY will be much less expensive while also being much more educational... but for those of use without the skills to design / build a custom system like this, the price is pretty darn reasonable. I was just looking at what JW Fisher charges to add compass and depth display to their ROV and it was $2,000! On a VideoRay Scout, it's not even an option so you'd have to buy a higher end system which would also set you back at least couple grand. I think I spend, in grand total, about $400 and was able to install it in an afternoon. And best of all it works absolutely perfectly. 
Re: DIY compass and HUD
Hi NCUWI.
I wasnt knocking your system, looking at your video it is a better graphic than mine. and i must agree $400 on a pro system is nothing, you can spend that on one connector for a work class ROV.
I was just offering an option for those who can't afford to spend $400 on a compass for a $100 home build rov.
Re: DIY compass and HUD
No problem. The most expensive part of the whole thing was the compass. The DragonLabs OSD+ was only about $100. Besides a compass, it also supports other I2C devices so you can add tons of other devices if you want (humidity, depth, etc.) and it also includes servo controls for an autopilot so there are a lot of things a hobbyist might be able to whip up with it. It's always cheapest to build from scratch, but that's assuming you don't make a mistake and fry something along the way. I've fried more than my share of electronics in the past. 
Re: DIY compass and HUD
I can't believe how small that video ray is! I imagined they were bigger.
Hobbyking has a bunch of osd systems too. their cheapest one is like $40. their fancy one is about $120.
http://www.hobbyking.com/hobbyking/stor ... emote.html
Hobbyking has a bunch of osd systems too. their cheapest one is like $40. their fancy one is about $120.
http://www.hobbyking.com/hobbyking/stor ... emote.html
Re: DIY compass and HUD
There are a lot of low cost OSD's out there, just visit the RC Groups forums and go to the FPV section and you'll find tons of info. The reason I went with the DragonLabs OSD+ was because it was the only low cost OSD I found that can plug and play with an off the shelf compass. If you're up to writing your own firmware or designing your own board, you can probably get some of the others to work also. Problem is that most FPV folks only need a GPS for navigation so most boards aren't designed to work with a compass. The other plus with the DragonLabs unit is that the designer is real interested in underwater ROVs so is super helpful and has offered to mod the firmware to work with pressure sensors and other bits. The video shows the first generation of OSD, the latest version includes a HUD version that's like an F16 fighter. I've got one of those boards too, just haven't had a chance to install it yet.
One more thing, although the VideoRay is pretty small, it has plenty of room inside for additional bits. The Scout, Explorer and Pro3 are essentially the exact same platform, just additional circuit boards are added in the higher end systems. But otherwise they are identical. In my opinion, they make a great starter platform for someone who wants to tinker with a ROV. For not a lot of money you get a fully functional, water tight, ROV with room for add ons and 2 spare wires in the tether for stuff like sonar or a gabber.
One more thing, although the VideoRay is pretty small, it has plenty of room inside for additional bits. The Scout, Explorer and Pro3 are essentially the exact same platform, just additional circuit boards are added in the higher end systems. But otherwise they are identical. In my opinion, they make a great starter platform for someone who wants to tinker with a ROV. For not a lot of money you get a fully functional, water tight, ROV with room for add ons and 2 spare wires in the tether for stuff like sonar or a gabber.
Re: DIY compass and HUD
that is the problem with the hk stuff. they are all geared towards flying fpv systems. It is great that the dragon guy is interested in our hobby. that alone would steer me towards their products.
Re: DIY compass and HUD
I'm revisiting this idea after burning out my osd chip, Doh!!
The new plan is to use a "minimosd" board which is basically an arduino chip driving an osd chip.
It's designed for mavlink but you can burn in your own arduino code very easily, just use arduino pro mini settings.
you have to hack the board to connect to the arduino pins you want to use for sensor inputs.
on mine this will be-
i2c bus for the compass on pins a4 and a5
leak sensor to a digital io pin
2 different battery volts to 2 anaolgue pins.
here's my code so far-
comments and suggestions welcome.
Code: Select all
//OSD leak sensor and voltage/ic2 compass monitor for ROV using reprogrammed minimosd board.
//minimosd board needs its pins hacked to connect sensors.
//use arduino "pro mini 5v 16Mhz w/atmega328" settings.
#include "SPI.h"
#include "max7456.h"      // from http://theboredengineers.com/WordPress3/wp-content/uploads/2012/12/max7456.zip Thanks Ben. :-)
#include "Wire.h"
const int leakPin = 2;
const int analogInPin1 = A0;
const int analogInPin2 = A1;
const int COMPASS_ADDRESS = 0xe0;
const int SLAVE_ADDRESS = COMPASS_ADDRESS >> 1;
const int LED_PIN = 13;
const int SIZE = 3;
byte headingData[SIZE];
boolean state = HIGH;
int headingValue;
int leakState = 0;
int sensorValue1 = 0;
int sensorValue2 = 0;
Max7456 osd;

void setup()
{
  pinMode(leakPin, INPUT);
  SPI.begin(); //to be called before osd.init
  osd.init(10); //CS on port 10
  osd.setDisplayOffsets(60,18);
  osd.setBlinkParams(_8fields, _BT_BT);
  osd.activateOSD();
  osd.print("OSD CHECK OK.",7,8,1,0);
  delay(3000);
  }
void loop()
{
  osd.clearScreen();

  leakState = digitalRead(leakPin);  // check if the leak is active.
  if (leakState == HIGH) // if it is, the leakState is HIGH:

   {
    // write blinking "leak!!!!!" to osd
    osd.print("LEAK!!!",7,11,1,0);
    delay(10000);
    return;
   }
  else
  {
  sensorValue1 = analogRead(analogInPin1);//max 5.5v. (sensor value is 0 to 1023)
  float voltage1= sensorValue1 * (5.0 / 1024.0)*3;
  // supply volts =15v, divide by 3 with resistors then scale back up in code.
  osd.print(int(voltage1),1,3,2,2,0,0);
  osd.print("V",1,8,0,0);

  sensorValue2 = analogRead(analogInPin2);
  float voltage2= sensorValue2 * (5.0 / 1024.0)*3;
  osd.print(int(voltage2),2,3,2,2,0,0);
  osd.print("V",2,8,0,0);

  compass();    // this can be commented out when not using compass.


  delay(50);
  }
}
/////////////////////////////////////////////////////
void compass()

{
   Wire.begin(); // start i2c bus
  Wire.beginTransmission(SLAVE_ADDRESS);
  Wire.write((byte)0x00);// first byte of "Get Data" command
  Wire.write((byte)0x31); // second byte of "Get Data" command
  Wire.endTransmission();
  delay(10);

  // Request the bytes
  Wire.requestFrom(SLAVE_ADDRESS, SIZE);
  for (int i=0; i<SIZE; i++)
  {
    headingData[i] = Wire.read();

  }
  headingValue = ( headingData[1]*256 + headingData[2] ) / 10;
  // The 1st received byte is useless...
  // The resulting 16bit word is the compass heading in
  // 10th's of a degree (MSB comes first)
  // example: a heading of 1345 would be 134.5 degrees

  osd.print(int(headingValue),3,3,3,1,0,0);
  delay(50);
}