
I haven't ordered it yet, but hope to do so soon. I'll report on its quality when I receive it.Kipper wrote:Have you received the enclosure from Blue Robotics? How do you think the value of a premade enclosure compares to a homemade one?
First steps for Project 'Titan Uranus'
Re: First steps for Project 'Titan Uranus'
Re: First steps for Project 'Titan Uranus'
Just finished the CAD for my pan & tilt brackets. Upwards tilt will be restricted to about 30 degrees but that's ok, ROVs mostly look down!
I could have made a tilt only mechanism which would tilt over the full range, but I wanted to make a pan & tilt just because I can!
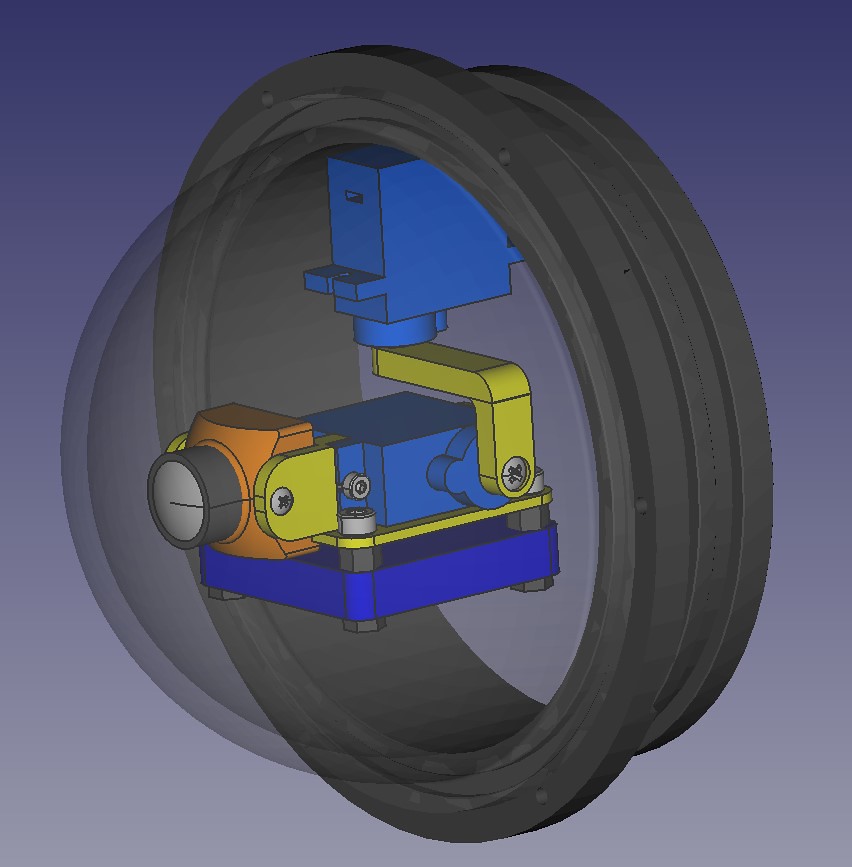
It's designed for a RunCam Split 2S.
I could have made a tilt only mechanism which would tilt over the full range, but I wanted to make a pan & tilt just because I can!
It's designed for a RunCam Split 2S.
Re: First steps for Project 'Titan Uranus'
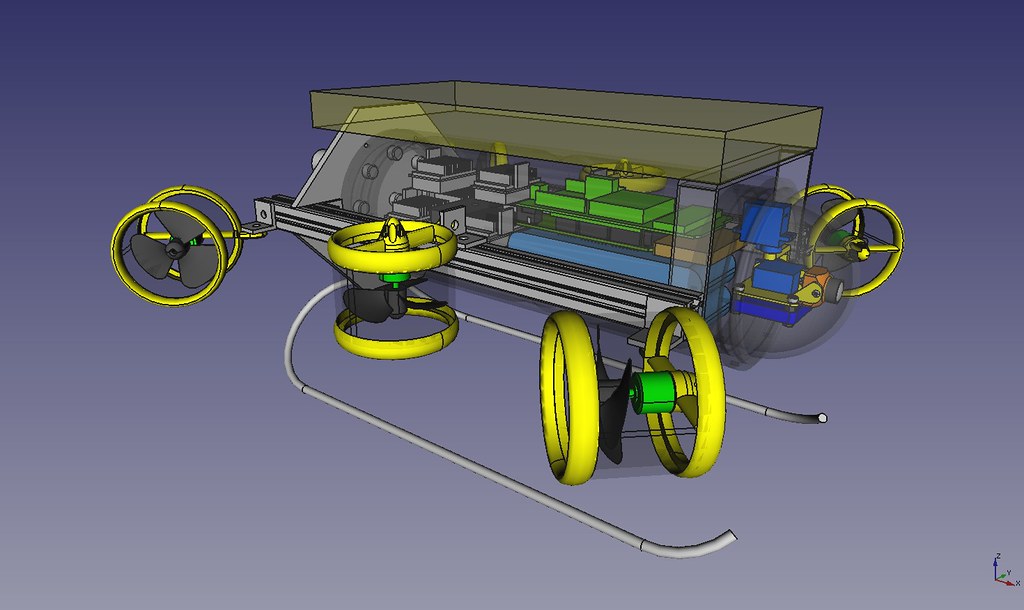
..and the updated full design. I made room for a fibre optic unit as well, by careful rearrangement of the motor controllers.
Re: First steps for Project 'Titan Uranus'
What are those side rails? Looks like 80/20
Re: First steps for Project 'Titan Uranus'
Standard 20/20. They even came cut to the correct length (350mm). Got them from Amazon.com. I chose them because they allow me to place thrusters, lights & ballast weights exactly where I want them and adjust for trim.Demon340 wrote:What are those side rails? Looks like 80/20
Re: First steps for Project 'Titan Uranus'
Ok so I hadn't intended CAD modelling the entire ROV but in order to make sure everything fits together it seems I've had to...
 Perspective 2
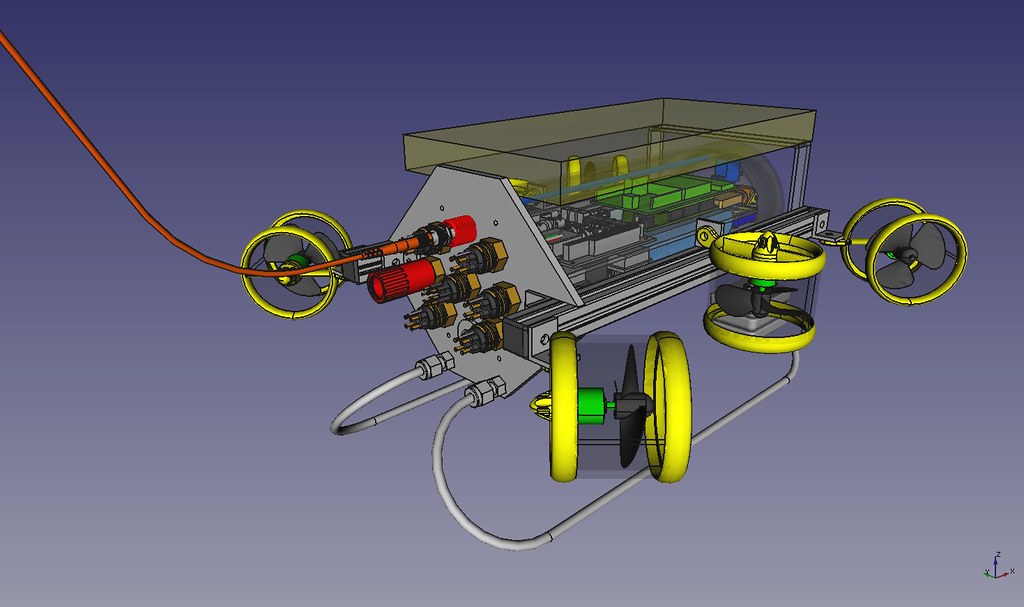 Perspective 3
Just some internal frame parts to model now.
Perspective 2Perspective 3Just some internal frame parts to model now.
Re: First steps for Project 'Titan Uranus'
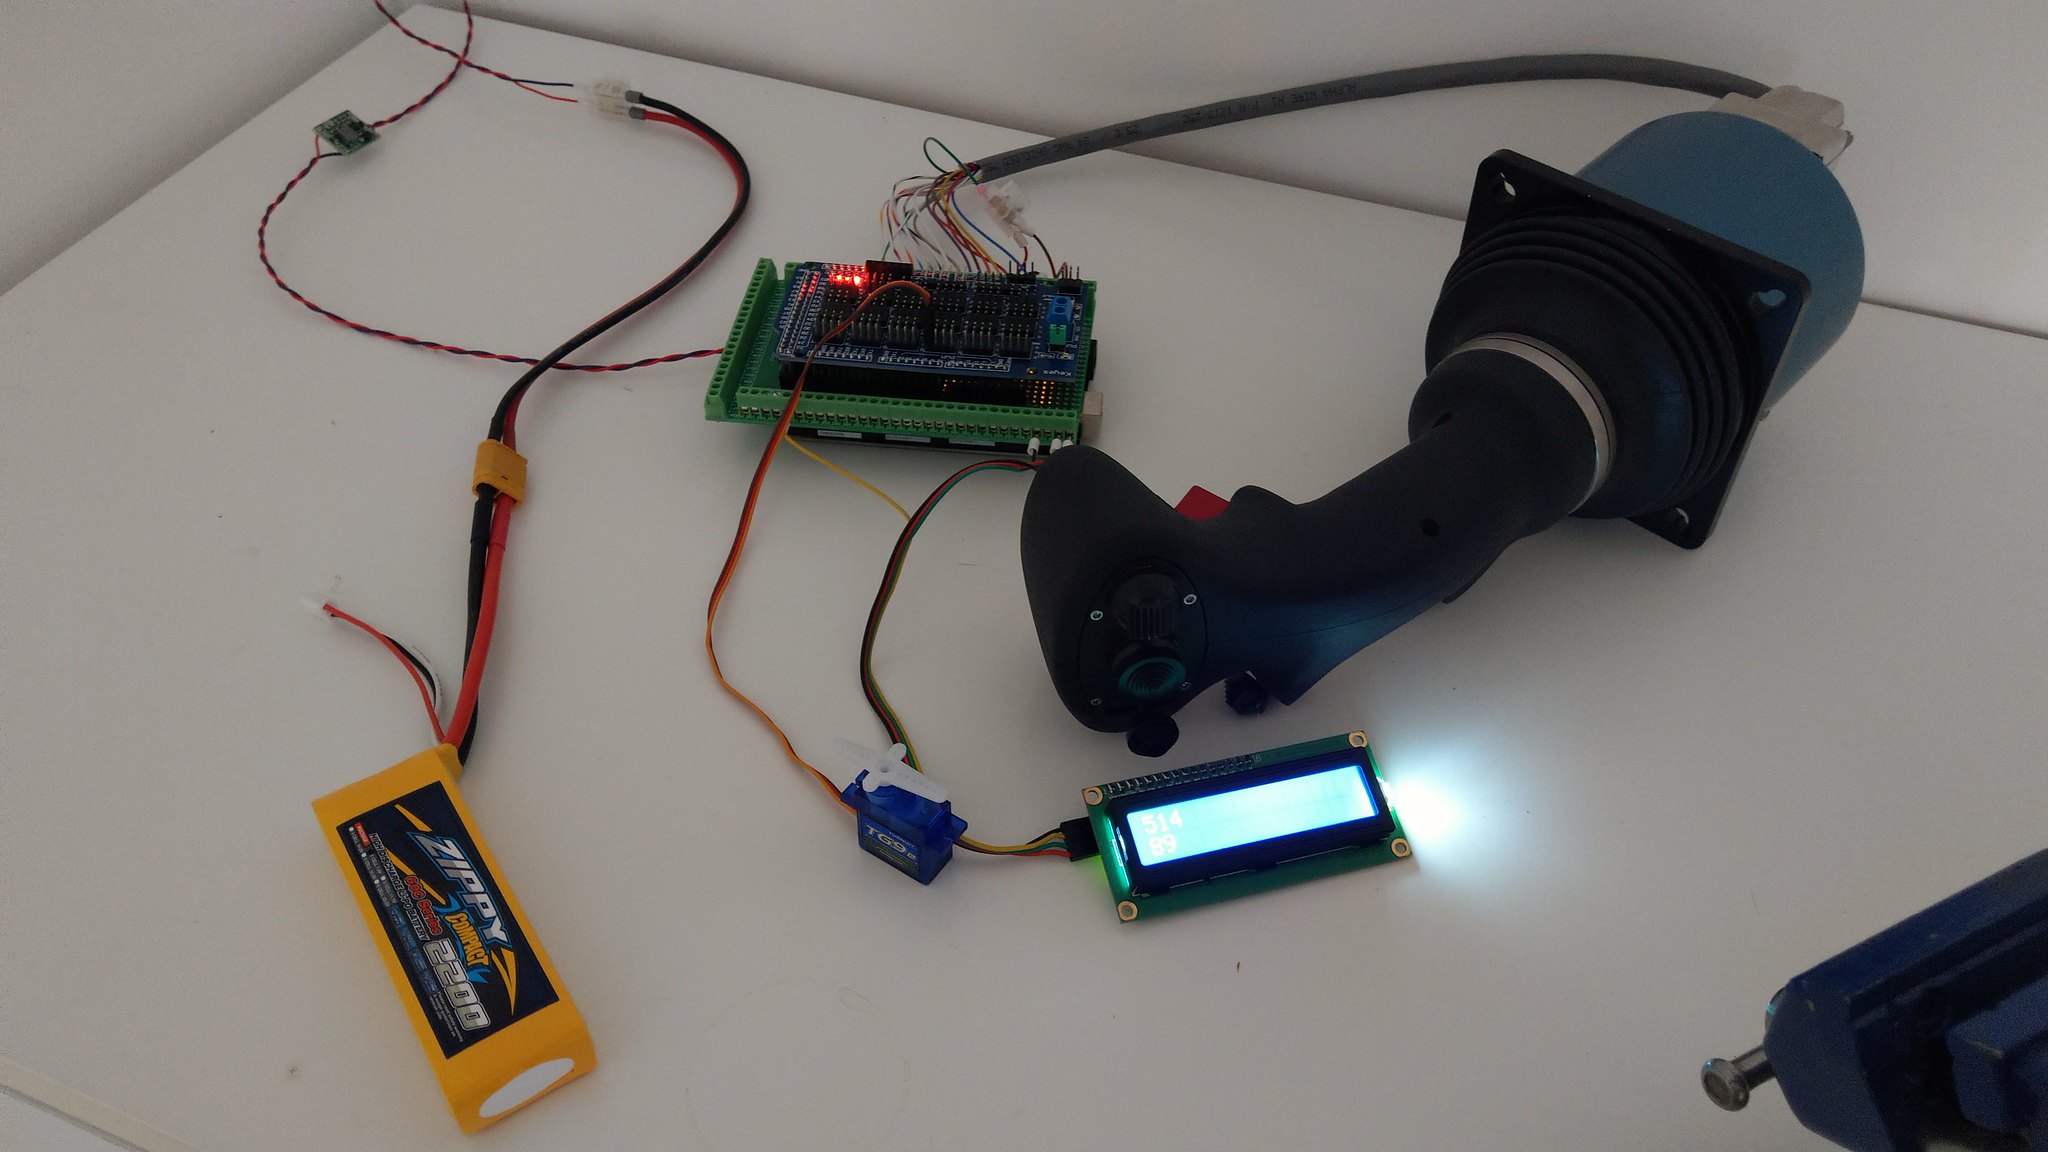
I've started on my revised topside console. Initially I'd planned to use a computer joystick but I decided to change that to using a professional ROV joystick that I have, and an Arduino to read it and display heading and depth from the ROV, all communicating with the Arduino in the ROV via the EasyTransfer library.
The first step was to make sure I could read the joystick inputs and display stuff on an LCD screen. The first part was easy, the second part less so, as I'd chosen to use an I2C LCD. Seems the libraries for this are not great so I spent about 4-5 hours just getting the display to work. If anyone else is struggling with an I2C display, use the library by F. Malpardita and you'll save yourself a lot of time.
Anyway, success was eventually achieved.
Short video here-
https://youtu.be/PjJt-N3tgLs
The display shows the input value from the joystick vertical slider on a scale of 0-1023 on the first line, and the output to the servo on a scale of 0-180 degrees on the second line.
Next step is do perform another wet test of my thruster, this time with a 3S LiPo, plotting thrust output against throttle value. After that, copy over all my old code for mixing the thruster values into the console Arduino as it is now this one which will be performing all the calculations. The ROV Arduino will simply command the thrusters as prescribed by the console Arduino, and read the heading & depth values.
Re: First steps for Project 'Titan Uranus'
So I thought I'd better get EasyTransfer working before I did anything else. It was not quite as 'easy' as advertised, but I did eventually figure out the problem. If you are using the hardware serial port (and maybe even the software ones, I'm not sure), you have to power up both Arduinos BEFORE connecting the two comm ports together to link the Arduinos. If you have the comms link in place in advance, the Arduinos detect it as a comms link to your PC and can hang.
Anyway, proof of concept now working, so I can get on with rewriting the code to get all the thrusters etc. working on the new two Arduino setup.
Short video here-
https://youtu.be/sScoPEyz1ec
Anyway, proof of concept now working, so I can get on with rewriting the code to get all the thrusters etc. working on the new two Arduino setup.
Short video here-
https://youtu.be/sScoPEyz1ec
Re: First steps for Project 'Titan Uranus'
I've now re-written almost all the code. I've added a battery monitor, and still need to add a thruster enable/disable function because at the moment if I don't establish comms between the Arduinos within two seconds, all the thrusters will go to 100% thrust! The lights will need a little bit of coding work too, just to make them work more smoothly.
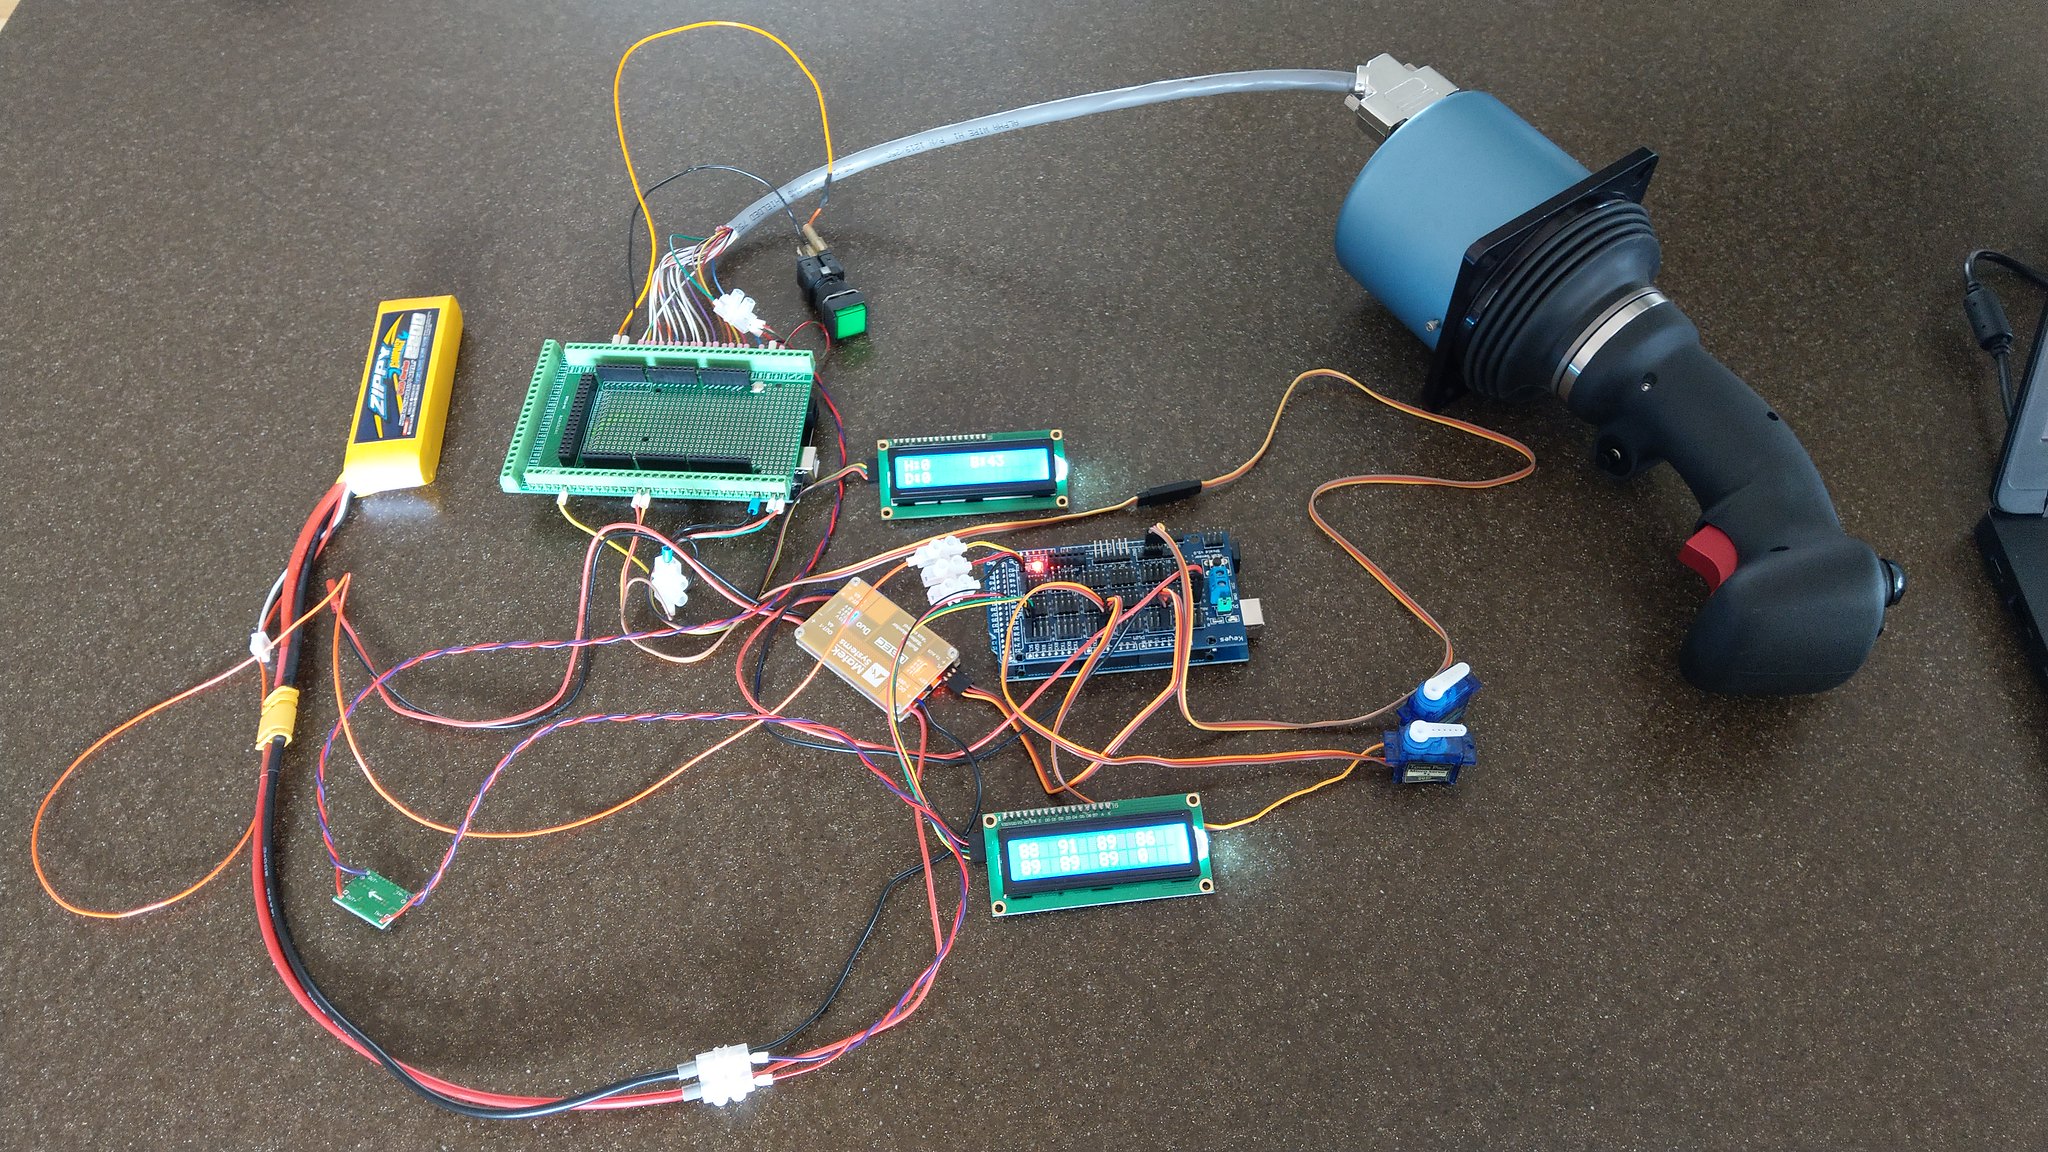
The upper LCD is the console and displays heading, depth and battery percentage. Currently only the battery percentage functions as I haven't bought the compass & depth modules yet.
The lower display is the ROV and is just for debugging. It displays the values for the four vectored thrusters, one of the vertical thrusters (they're both sent the same value anyway), the pan & tilt values, and the lights on/off value.
Re: First steps for Project 'Titan Uranus'
I drew up a circuit diagram to show how it will all be wired up when it's finished.
Thrusters & motor controllers omitted for clarity.

Thrusters & motor controllers omitted for clarity.