Rov Reboot (3D Printed Rov)

What are you working on .... Show off your Rov's Projects here.
User avatar
sthone
Posts: 589
Joined: Nov 8th, 2010, 9:25 pm
Location: Connecticut
Contact:

Re: Rov Reboot (3d Printed)

Post by sthone »

Camera Tube 21.jpg
Camera Tube 21.jpg (355.77 KiB) Viewed 51791 times
Back to work on the end cap... I bored out the recesses today to make room for the camera now I just have to drill some holes for the penetrators.
Camera Tube 22.jpg
Camera Tube 22.jpg (411.78 KiB) Viewed 51791 times
The spring pressure idea of the original camera mount was not going to be secure enough so I had to redesign the main camera mount so it could screw to the end cap. This should keep everything nice and tight and in place.
User avatar
sthone
Posts: 589
Joined: Nov 8th, 2010, 9:25 pm
Location: Connecticut
Contact:

Re: Rov Reboot (3d Printed)

Post by sthone »

Camera Tube 23.jpg
Camera Tube 23.jpg (519.45 KiB) Viewed 51787 times
As a quick side project and basically just out of curiosity to see if 3D printed parts would handle any kind of pressure and actually be waterproof I printed up a endcap to my camera housing to test out in the pressure chamber.
Camera Tube 24.jpg
Camera Tube 24.jpg (557.98 KiB) Viewed 51787 times
The o-ring seal on the tube looks good but I don't know how well they will seal against the printed surface if the surfaces of the part will actually stop the water. Even printed at 100% infill with 4 outer shells all around I don't have high hopes that it will work but its worth a shot just to know once and for all.

It's in the chamber now and I'm going to leave it in there for at least an hour before I check on it.
Camera Tube 25.jpg
Camera Tube 25.jpg (1.22 MiB) Viewed 51782 times
As suspected... it didn't work. :? I'm not exactly sure of where it leaked but you can see water and air in between the two o-rings so I'm guessing everywhere... :lol:
User avatar
sthone
Posts: 589
Joined: Nov 8th, 2010, 9:25 pm
Location: Connecticut
Contact:

Re: Rov Reboot (3d Printed)

Post by sthone »

Camera Tube 26.jpg
Camera Tube 26.jpg (734.45 KiB) Viewed 51777 times
Ok back to the real end cap... I drilled and tapped 5 holes for the 4-40 brass screws I will be using for penetrators. I wraped the screws with a bite of thread sealing tape before inserting them in the cap.
Camera Tube 27.jpg
Camera Tube 27.jpg (561.08 KiB) Viewed 51777 times
Here they are on what will be the inside of the tube...
Camera Tube 28.jpg
Camera Tube 28.jpg (642.18 KiB) Viewed 51777 times
...and here the are on the water side. I planned on secure the wires on this side with nuts but really don't have the room so I might have to machine other threaded fittings if I want to be able to remove the pod from the Rov.
Camera Tube 29.jpg
Camera Tube 29.jpg (604.86 KiB) Viewed 51777 times
Wires are soldered to the bolt heads on the inside for the camera and tilt motor. I might just solder the water side wires on too in the long run.

It's back in the chamber being tested now. Once again to be continued....
User avatar
sthone
Posts: 589
Joined: Nov 8th, 2010, 9:25 pm
Location: Connecticut
Contact:

Re: Rov Reboot (3d Printed)

Post by sthone »

Camera Tube 30.jpg
Camera Tube 30.jpg (679.44 KiB) Viewed 51774 times
Tonight's test saw the slightest bit of water in the tube. I'm not sure if its from the new penetrators or not so I'll have to retest it tonight with the tube stuffed with some tissue and paper towels to determine exactly where the leak is coming from. If it is from the penetrators I can just seal them by filling the recess with epoxy if it comes to that.

I'm also testing at a simulated depth of 200' and this Rov only has a 100' tether so the working depth is more around the 75' mark. (which it will probably never see anyway.)
User avatar
sthone
Posts: 589
Joined: Nov 8th, 2010, 9:25 pm
Location: Connecticut
Contact:

Re: Rov Reboot (3d Printed)

Post by sthone »

Camera Tube 31.jpg
Camera Tube 31.jpg (583.75 KiB) Viewed 51765 times
To test where the leak is coming from I stuffed some tissue paper in above the penetrators and then put another piece loose in the housing. What this shows is if the tissue is wet where the penetrators are that's where the water is coming in and if the loose piece is wet it's the o-rings.
Camera Tube 32.jpg
Camera Tube 32.jpg (610.12 KiB) Viewed 51765 times
Well it turns out it is the penetrators. Looking closely I can now see I got them too hot soldering the wires on and you can see they melted into the housing. I'm sure the threads deformed enough to allow water to past through and it just goes to show what pressure can do. I'm sure they would still work at the depths I will be running but I'll just go ahead and use some epoxy to seal them up so I can move on with the build.

-Steve :sting:
User avatar
Bennachie
Posts: 113
Joined: Jul 6th, 2018, 11:38 am

Re: Rov Reboot (3d Printed)

Post by Bennachie »

I like your idea for the penetrators. I think I've been over-thinking mine.

Why not solder or crimp the wires to ring terminals then put the brass screws through them? Saves soldering directly to the screws and melting your cap.

You might also find that the screw threads themselves leak no matter what. In the industry, any screw penetrating a one atmosphere housing would have an o-ring under the head and a seat machined into the housing to take the o-ring.
User avatar
sthone
Posts: 589
Joined: Nov 8th, 2010, 9:25 pm
Location: Connecticut
Contact:

Re: Rov Reboot (3d Printed)

Post by sthone »

I originally planned on using ring terminals on the outside but for some reason it never crossed my mind to do it on the inside too. :oops: I figured the teflon tape would work enough for the depths I and going to be using this but yeah an o-ring under the head probably would have been a better idea next time I'll give that a try.... thanks.

-Steve :sting:
User avatar
sthone
Posts: 589
Joined: Nov 8th, 2010, 9:25 pm
Location: Connecticut
Contact:

Re: Rov Reboot (3d Printed)

Post by sthone »

Camera Tube 32-2.jpg
Camera Tube 32-2.jpg (88.87 KiB) Viewed 51706 times
I added some epoxy to reinforce the sealing of the connectors.
Camera Tube 33.jpg
Camera Tube 33.jpg (667.92 KiB) Viewed 51725 times
On to the wiring... running the wires through the camera shaft was a bit of a pain I should have done this before gluing the camera mount to the shaft. I didn't have much room to solder on the motor wires either as I couldn't leave to much slack in the cap.
Camera Tube 34.jpg
Camera Tube 34.jpg (697.53 KiB) Viewed 51725 times
I was able to squeeze all the wires in there and get the camera mount screwed to the end cap.
Camera Tube 35.jpg
Camera Tube 35.jpg (632.26 KiB) Viewed 51725 times
Next I cut the plug off the camera cable and spliced it into the wires on the end cap.
Camera Tube 36.jpg
Camera Tube 36.jpg (472.85 KiB) Viewed 51725 times
So far so good... Next I have to attach the tether wires to the end cap and test the camera feed. I'll probably have to machine some small screw on fittings to do this as I don't want to try soldering to the through connectors again.
User avatar
sthone
Posts: 589
Joined: Nov 8th, 2010, 9:25 pm
Location: Connecticut
Contact:

Re: Rov Reboot (3d Printed)

Post by sthone »

Camera Tube 37.jpg
Camera Tube 37.jpg (792.58 KiB) Viewed 51699 times
Tonight I started to wire the camera to the camera cable in the tether. Originally I just cut the plugs off the camera cable going through the tether (and recently off the camera) figuring I would just solder them back on later and plug all the plugs together. Well I wasn't sure how the plugs would fare open to the water so I decided to just leave all the plugs off and try to solder the wires from the cable to the through connectors. (plus there there was the fact that I misplaced the plugs that go back on the cable end. :oops:) It took a bit of trial and error with the multimeter to figure out which wire was what. I figured in the camera cable the black and red would be power and the white would be video and the other bare wire was some type of shield.... it turns out that was not the case as I forgot this cable is wired for sound too. The bare wire was the ground (and shield?), the white was the Positive, the black was Video, and the Red was sound. (maybe I'll go back and add a speaker just for the hell of it.) I also had to splice on a new power connector because the one that came on the camera cable was a size I've never seen before.
Camera Tube 38.jpg
Camera Tube 38.jpg (680.27 KiB) Viewed 51699 times
On the Rov side for now I just soldered on some alligator clips for testing purposes. I used the clips to temporally connect the wires to the through connectors.
Camera Tube 39.jpg
Camera Tube 39.jpg (817.85 KiB) Viewed 51699 times
I hooked the feed up to my basement TV and holding my breath I plugged in the power adapter... surprisingly enough everything was correct and I have a picture. The image isn't to bad in color with some lights on but the camera switches to B/W in low light situations and I'm not sure how impressed I am with that quality yet. I'm definitely going to need to add on some flashlight or something.
User avatar
sthone
Posts: 589
Joined: Nov 8th, 2010, 9:25 pm
Location: Connecticut
Contact:

Re: Rov Reboot (3d Printed)

Post by sthone »

Camera Tube 40.jpg
Camera Tube 40.jpg (648.35 KiB) Viewed 51676 times
I almost forgot to drill and tap the camera pod mounting screw location so I took care of that before wiring up the camera.
Camera Tube 41.jpg
Camera Tube 41.jpg (615.53 KiB) Viewed 51676 times
Next I had to machine up some tiny retainer nuts for the through connectors.
Camera Tube 42.jpg
Camera Tube 42.jpg (403.64 KiB) Viewed 51676 times
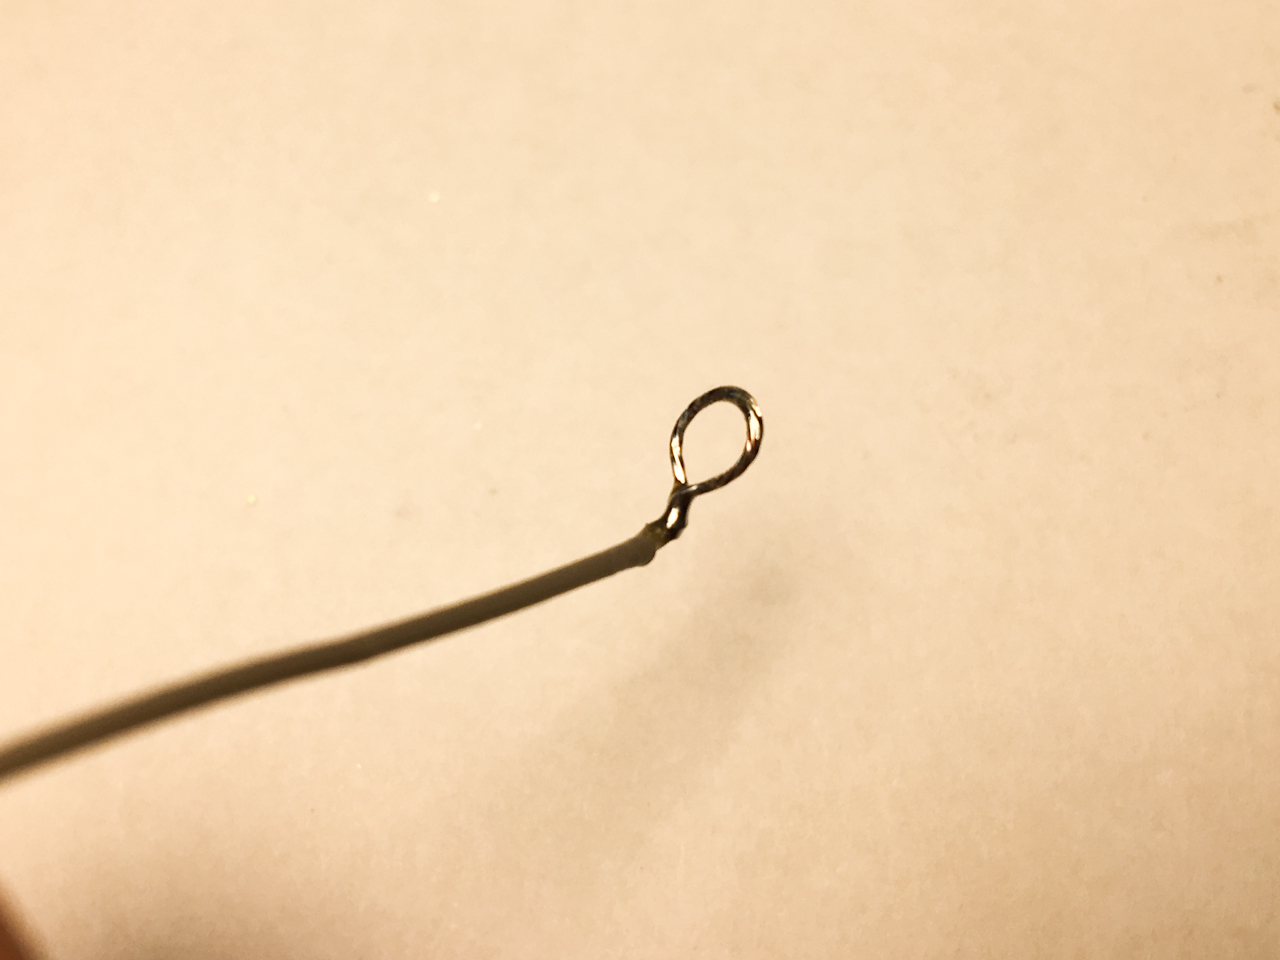
I'm just making my own ring terminals by looping the wire around a larger 6-32" screw....
Camera Tube 43.jpg
Camera Tube 43.jpg (460.7 KiB) Viewed 51676 times
... and then hitting it with some solder to reinforce them.
Camera Tube 44.jpg
Camera Tube 44.jpg (747.7 KiB) Viewed 51676 times
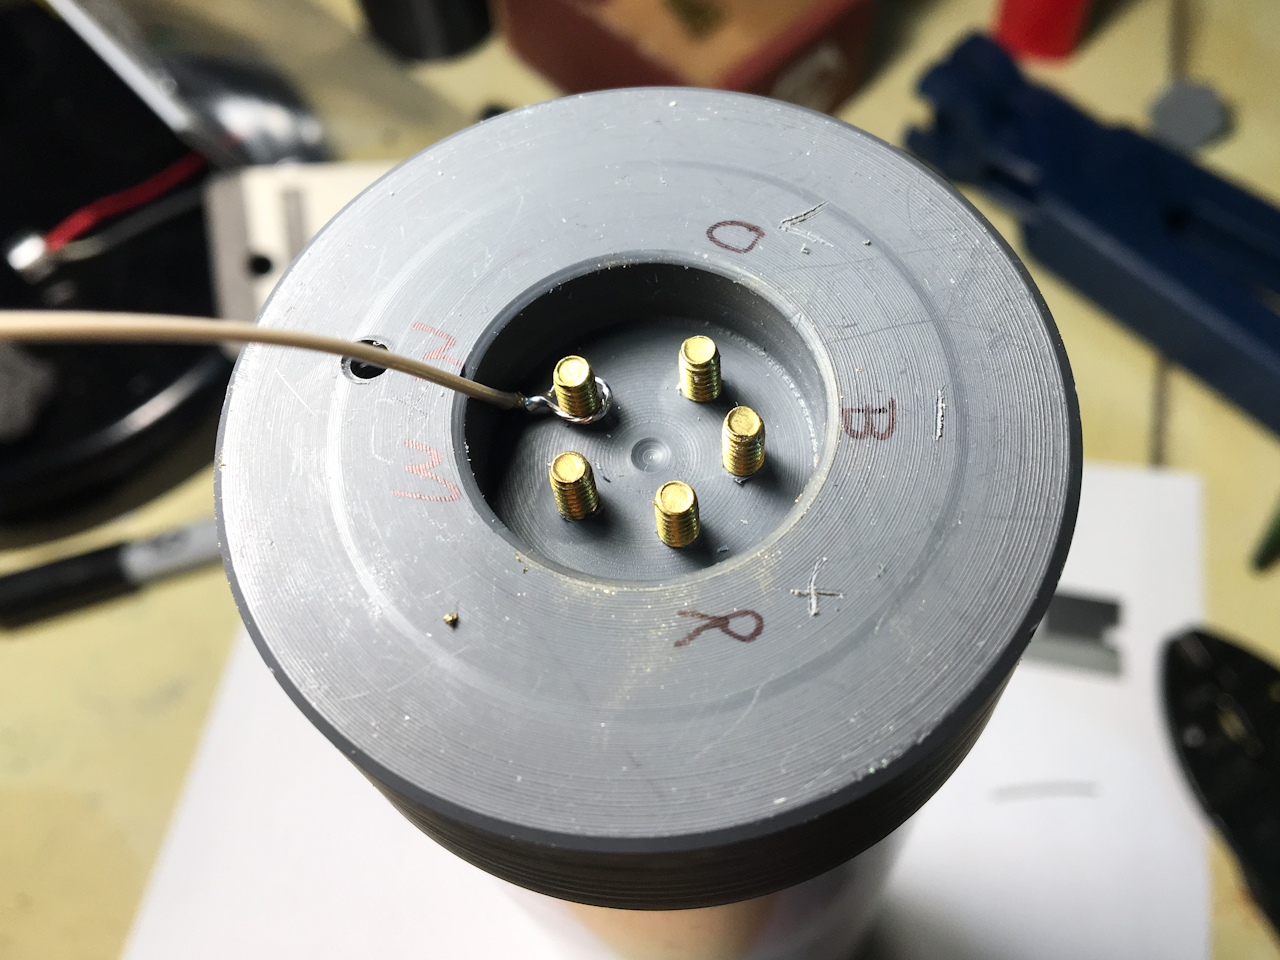
The idea is to simply slip them on the 4-40" through connectors...
Camera Tube 45.jpg
Camera Tube 45.jpg (705.61 KiB) Viewed 51676 times
... and secure them with the nuts I machined.
Camera Tube 46.jpg
Camera Tube 46.jpg (693.38 KiB) Viewed 51676 times
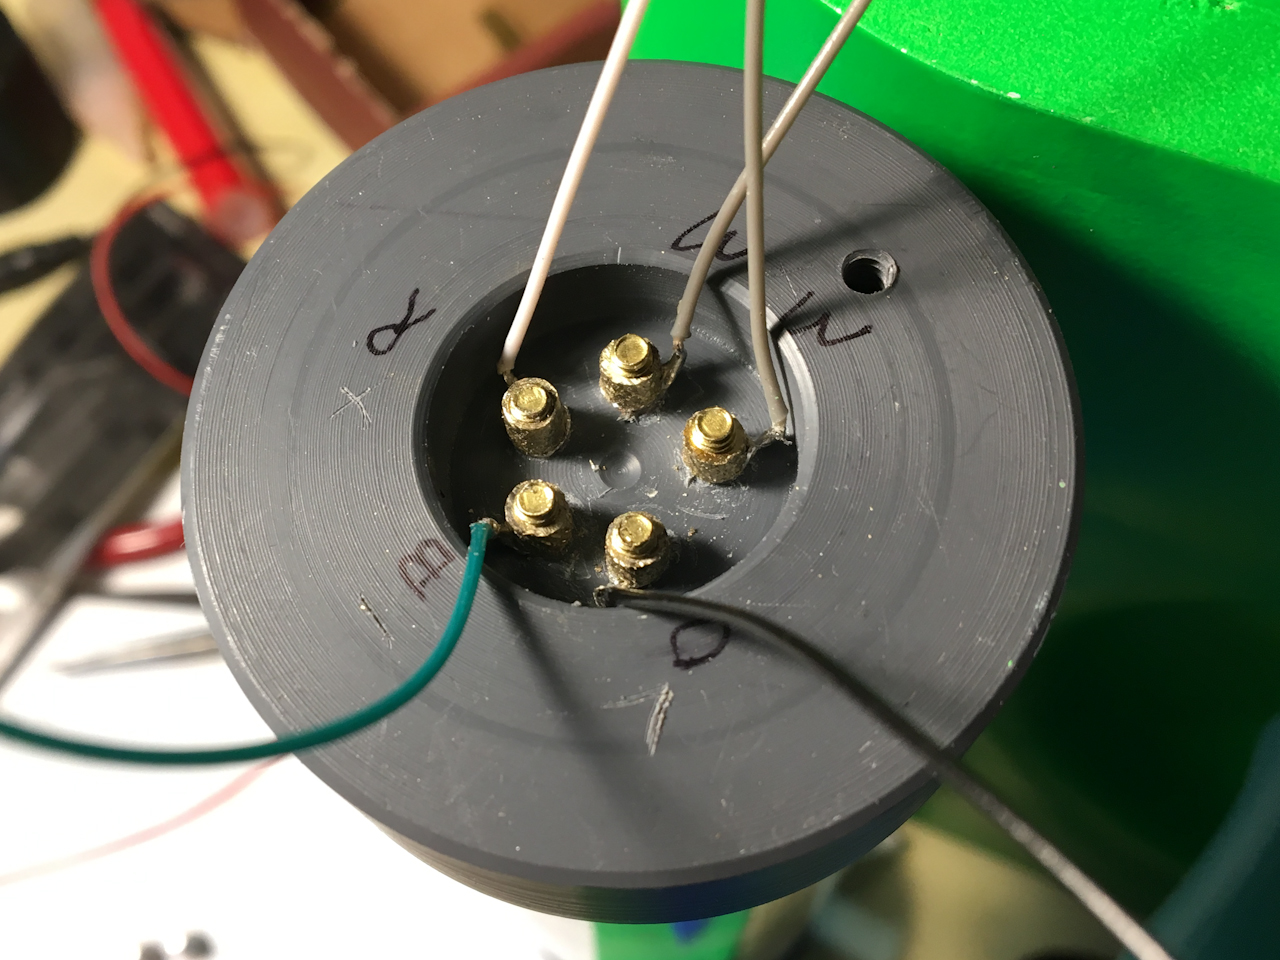
This was a little more tedious then I imaged but I did get them all connected.
Camera Tube 47.jpg
Camera Tube 47.jpg (865.04 KiB) Viewed 51676 times
Now I just have to splice these wires into the camera cable in the tether, test the camera again, and figure out whats next.
Post Reply