Wow Roar! That looks great! I think I may have to order one of those LCDs too, although it's amazing how much info can be put on the 16x2 ones.
I am working on the OSD now, I still can't get it to work, I think my main problem now is the Character set that I'm using and the library. I am using the sparkfun breakout and it originally would give Japanese characters with the hello world example. I have loaded various different .mcm files but so far not the right one. There seems to be about 3 libraries too so it's been easy for me to get mixed up.
@TigerShark, you are right about the cable, I also had a couple of bad solder connections.
Re: Rov from Norway
Posted: Mar 18th, 2014, 4:31 am
by kenl
Hi Roar,
I finally got things working on my test bench , next it is to transfered to the ROV.
while(PINA&2); //Wait for VSYNC to go to 0 this is on pin 23
I understand it is to stop screen flicker, but I don't get how it works?
Would you mind explaining please?
Regards Ken
Re: Rov from Norway
Posted: Mar 18th, 2014, 6:39 am
by RoarRoar
You've probably done it already but,First you need to connect a 1kohm resistor to 5v and to the VSYNC pin on max7456.Once you have done that,connect the VSYNC pin to a pin on the Arduino,i use pin 23 on Mega 2560,(remember to use pinMode(23,INPUT);
Everything that appears on the screen now, go through VSYNC pin.
it was not me,who came to this solution,but this is only solution to stop screen flicker on max7456.
how it works? i dont now,but i think the while(PINA&2); reduces the number of times the text is sent to the OSD,without while(PINA&2); the text is sent all the time to OSD,therefore you will get screen flicker.
Re: Rov from Norway
Posted: Mar 18th, 2014, 8:24 am
by kenl
I have connected the resistor, i have connected to pin 2 my pro mini, and coded pinMode(2,INPUT);
But it won't compile it tells me:
error: 'PINA' was not declared in this scope
Your code tells me the same if I try to compile it so I think it must be in your modified Library.
But on the good side, I get no flicker at all so far, but have only used it with video out, no input so far.
As you probably know there are at least 3 main libraries out there for this chip and many more character files. Somehow my libraries got corrupted and i had to delete them all and only load the one that I thought would work ( the one in your post) and hey presto it all worked
I think because all the *.cpp and *.h files have the same first name windows sort of picked a favourite one for me ???
Anyways thank you for your explanation, but I am not brave enough to load yet another *.cpp file to see if that is where the PINA&2 comes from.
Have you found the max7456 breakout board to be VERY VERY power hungry? Mine won't run from the Uno power supply with the lcd (16x2) on at the same time
Re: Rov from Norway
Posted: Mar 18th, 2014, 4:47 pm
by RoarRoar
ok,you need to use the modified MAX7456 CPP file, this is also modified to show custom character.
Max7456 breakout board Need much power,i use 9 volt 2 amp.
Re: Rov from Norway
Posted: Mar 23rd, 2014, 3:34 pm
by RoarRoar
I have now found out,how to split up X,Y,Z and show separately on the screen.I have do some changes in MPU9150Lib,cpp file and Bottonside Code.
About the Z axis,i think i have found out how to show 360 degrees.Right now,it shows only +0 to 180 and -0 to 180 degrees
I have now fix the Z axis, it`s show now 0 to 360 degrees, i add +180 on this:
On the compass i have add.North,South,West,East--- (on Norwegian)
I have made some custom symbol for ROLL,PITCH.
Arrow up with F and degrees,mean Front of rov is 20 degrees up.
Arrow down with F and degrees,mean Front of rov is 20 degrees down.
Arrow down with V and degrees, mean left side of rov is 20 degrees down.
Arrow down with H and degrees, mean right side of rov is 20 degrees down..
This is the best solution I have come on,right now.
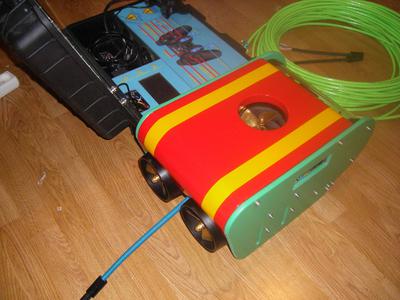
I have now make a Manipulator and two light to my rov.
Here is a picture of my rov,with Manipulator and light.
Re: Rov from Norway,finished
Posted: Jul 2nd, 2014, 4:22 pm
by RoarRoar
Hello everyone
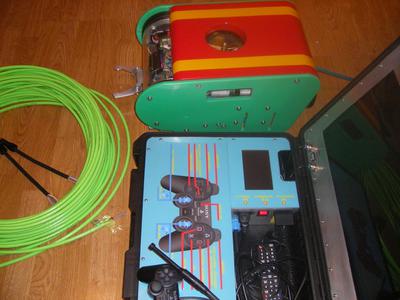
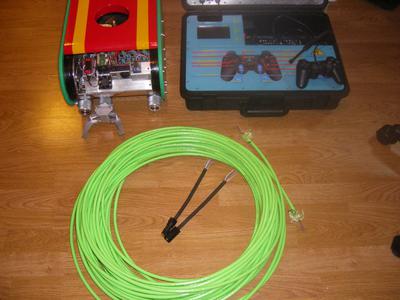
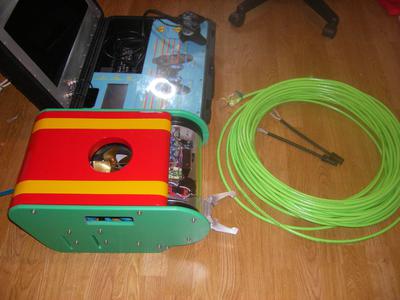
I am now finished with my rov,i have only test it in a swimming pool and is working awesome.
I have buy 165 feet of Neutral Tether from seabotix,Diameter is 9 MM or 0.35. Is enough to test the rov in seawater.
(if i need more Tether, i will buy Negative Tether, is not sow hard to get,but need to have Polyurethane jacket)
I need to use potting compound (I have order 3M 2131-B) to casting seacon contact to the Tether,sow i need to make a Moulding.
Here is some pictures:
Re: Rov from Norway,finished
Posted: Jul 3rd, 2014, 3:25 am
by olegodo
Looks really good Roar!
You were running power down the tether right?
Where in Norway do you live? Would have been fun to have a look at it some time