|
How To's
Simple Camera and Light Housings |
|
|
 |
|
First your going to need a PVC UNION, this one happens to be a 2" threaded style. I'd prefer to use a solvent or slip fit style one so one end can have a cap glued on. Gluing on an end cap will reduce the chance of leaks happening, the more threaded ends you have the more chances of it leaking. For the sake of this tutorial a threaded union was all I could find.
|
|
|
 |
|
Here is the difference between a solvent/slip fit and threaded unions.
|
|
|
 |
|
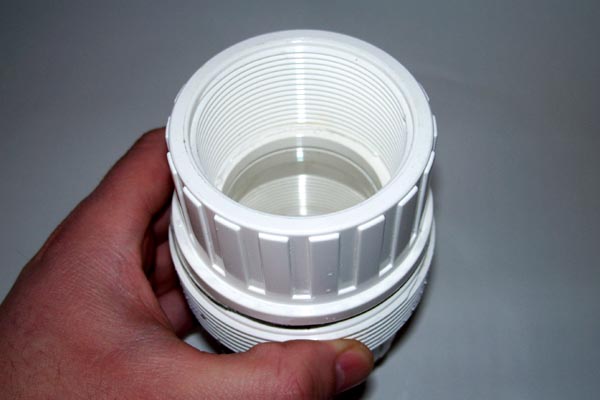
This is what the three parts of the Union "should" look like when disassembled, for this tutorial I'll call the first piece with the O-ring the Main Housing, the middle piece is the Cap, and the last piece will be the Contact Ring.
|
|
|
 |
| When buying your Union you have to pay attention to which half the O-ring is on, I ordered this slip fit one on line so I didn't get to see how it was made before I bought it. You can see from the above picture the O-ring was on the wrong side so I couldn't use this one for the tutorial. (You'll see why later on) The O-ring should be on the half with the threads so the Window will seal on the O-ring when the Cap is tightened. |
|
|
|
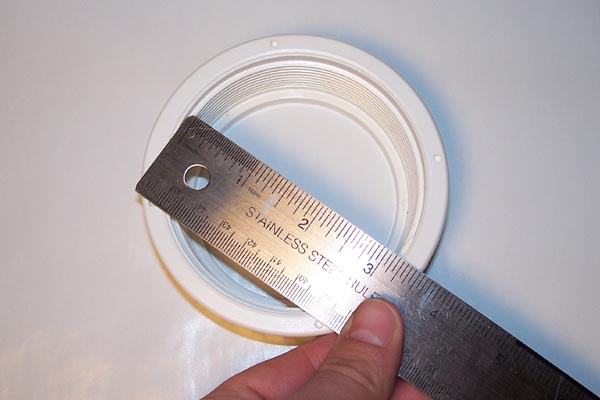
The first step is to measure the inside diameter of your Cap, It this case mine was about 3 1/8".
|
|
|
 |
|
Next you'll need a piece of Plexiglas for your main Window. You will be using a compass to trace out a circle to the correct size from your measurement. Be sure to apply masking tape to both sides of the window to protect it. I recommend doing this even if the Plexiglas has a coating on it. You can see I put multiple layers on where the compass point will sit. (Remember to divide your measurement in half when setting the compass.)
|
|
|
 |
|
If you don't have a compass just lay the Cap on the Plexiglas and trace the opening......
|
 |
|
.......Then just measure the distance of the flanged edge on the cap........
|
 |
|
.......and using that measurement add another circle to the one you just traced.
You can freehand this one it doesn't have to be perfect. |
|
|
 |
|
Now just cut out the circle, either the compass line or the freehand line you drew (not the traced line)
I find a band saw or copping saw works best. |
|
|
 |
|
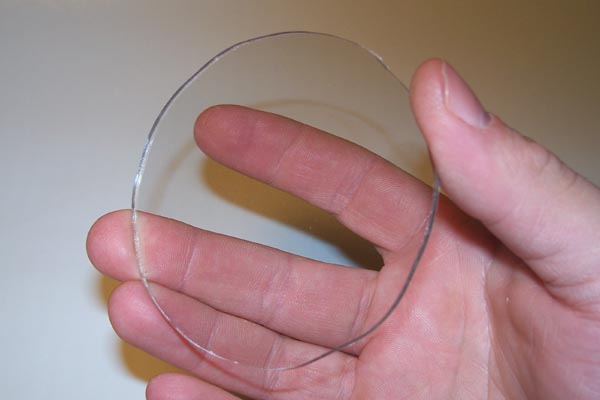
Remove the tape and any other protective film and you should now have your main Window.
|
|
|
 |
|
Now just double check the fit, again it doesn't have to be perfect it just has to fit inside the Cap.
|
|
|
 |
|
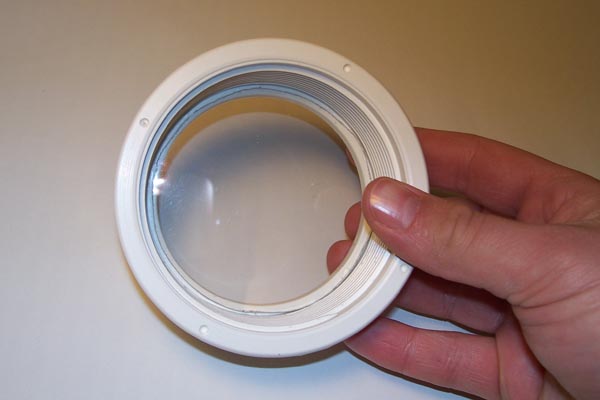
Now take the Main Housing Piece and place your Window on top of the O-ring. You should see now why the O-ring has to be on the threaded side. (Make sure the O-ring is clean, it doesn't take much dirt to cause a leak)
|
|
|
 |
|
Then just place the Contact Ring on the Window and screw on the Cap.
|
|
|
 |
|
Your finished housing should look something like this.
|
 |
| In this case I'm using a 2" plug to seal the rear, if you were using a slip fit union you would cut a small section of pipe and glue that in and then glue on a cap. (I would remove the window before using any glue though.) Some people even incorporate the Union into the actual design of thier Rov's main Housing. |
|
|
 |
| You can leave the whole Contact Ring piece off and just sandwich the Window between the O-ring and the Cap (as seen above) but I think the Contact Ring applys a more even pressure across the entire Window so I like to use it. |
|
|
 |
|
Just for appearance though I took it one step further and cut the flange part off of the top Contact Ring. If you do choose to leave it on and it will act as a sun shade for the camera though.
|
|
|
 |
| Here is my finished Housing with the camera mocked up inside. You can use these simple housings for the Camera as well as lights. |
|
|
| You can drill a hole in the rear for the wires to exit and seal it up with Silicone, Epoxy, JB Weld, or anything along those lines. I like to tap the hole with a course thread tap to give the glue I little more bite.
You can use PCV Bushings to step the hole down to 3/4 or 1/2" and use a Cord Connector for the wires exit but these can be hard to find sometimes. |
|
|
 |
| All Information, Pictures, and Material is copyright © 1998-2009 by Stephen Thone and may not be used for any personal or commercial purposes without the consent of the author. All rights reserved. The Author makes no guarantees or warranties as to the accuracy or completeness of, or results to be obtained from accessing and using the Information herein. | |||